
Campaign Map
at start of battle
Two battles
are fought at the same time. 4th
French division attacks 4th Austrian division at Montebello and 3rd
Austrian division attacks 3rd French division at Verona.
Having
defeated the western Austrian column at Solo, Bonaparte now turns his attention
to the eastern one at Montebello. His
aim is to defeat 4th division before they can join forces with the
main Austrian army south of Lake Garda
Wurmster is
moving his army south in four separate columns. His intention is to concentrate his army
south of Lake Garda before marching south to raise the siege of Mantua

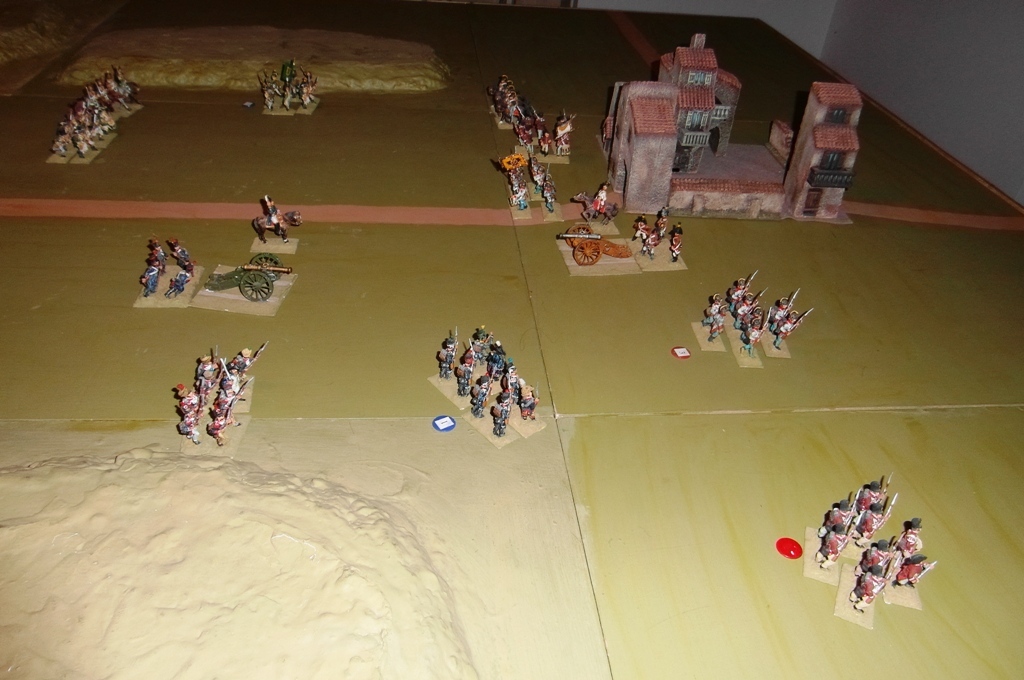
Table at
start of battle
Centre right is Montebello
Bottom left is San
Bonifacio
Centre right Austrians in
defence at Montebello
Centre left French
deployed ready to attack

4th
French division
General Argereau
is a Poor commander
He commands
3200 infantry, 400 cavalry and 400 gunners
His infantry
are better skirmishers than the Austrian
His
artillery is less effective than the enemy

4th
Austrian division
General
Scoboszlo is a Poor commander
He also
commands 3200 infantry, 400 cavalry and 400 gunners
Half of his
infantry are poor skirmishers but have effective volley fire
His
artillery are all 9 pounders against the French 6 pounders.

Move 1 – 0800 to 0900
Both divisions start the battle of Move orders
French division advance behind cavalry screen
Austrian dragoons move to right flank to counter enemy
cavalry

Move 2 – 0900 to 1000
Austrian gunners cause first casualties on French infantry
One Austrian infantry brigade move through town to support
cavalry

Move 3 – 1000 to 1100
Austrian infantry receive artillery casualties and are
shaken
French dragoons charge enemy cavalry but lose melee and
retire shaken

Move 4 – 1100 to 1200
Austrian cavalry fail morale check to opportunity charge
shaken dragoons
Dragoons retire behind square, pass morale and rally to
disordered
Austrian infantry move to reinforce their left flank

Move 5 – 1200 to 1300
Argereau
halts his left flank and orders his right to advance
Scoboszlo
joins his left flank in preparation for the anticipated infantry attack
Move 6 – 1300 to 1400
French gunners continue to pound the Austrian infantry
causing 30% casualties
Infantry fail morale and rout, as do their supporting
militia infantry
The loss of his left flank is a disaster for Scoboszlo

Move 7 – 1400 to 1500
French left flank remains outside enemy artillery range
French right moves towards the town
Austrian gunners retreat into town
Austrian infantry continue to rout towards the table edge

Move 8 – 1500 to 1600
Scoboszlo
orders his division to retreat
His left
hand infantry turn to face the approaching French infantry
French
gunners limber and advance to support the infantry

Move 9 – 1600 to 1700
Austrian military infantry in the centre retreats towards
town
Line infantry deploy into line to cover the rest of the
division as they retreat
French artillery unlimber at close range of enemy infantry

Move 10 – 1700 to 1800
French
gunners fire at close range
Austrian
infantry break and rout into supports
Supporting
infantry also break and join rout
French
infantry advance to occupy town
Summary
Argereau has
won an easy victory in the second battle of the campaign
For a loss
of 1600 infantry he has defeated the second of the three Austrian columns
Szoboszlo has
lost 4000 infantry and the remainder
have routed
We used our own wargame rules to fight the battle
They can be found here
No comments:
Post a Comment